Adding New Products
- Navigate to Dashboard ▸ OhDish (Website) ▸ Selling ▸ Products
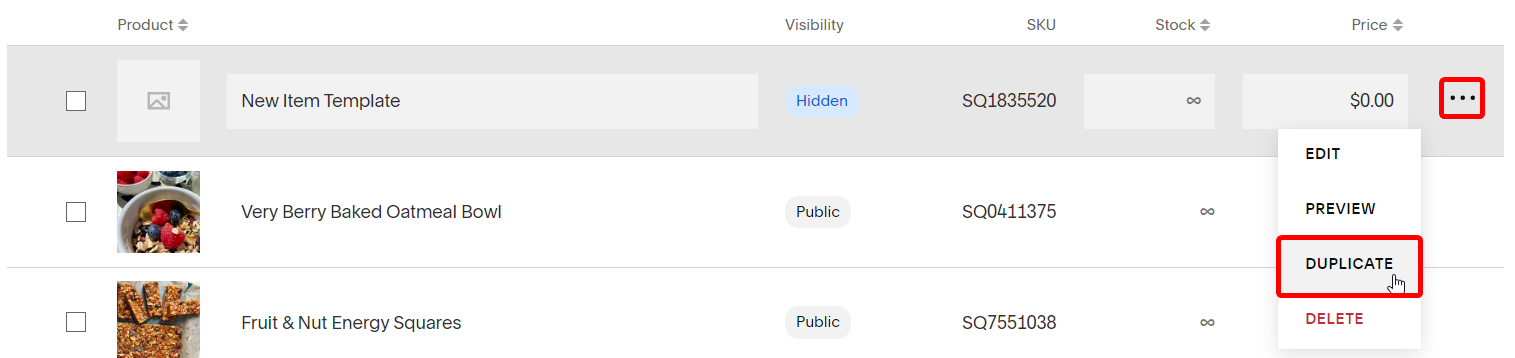
- While hovering over New Item Template, click the "⋯" and choose Duplicate
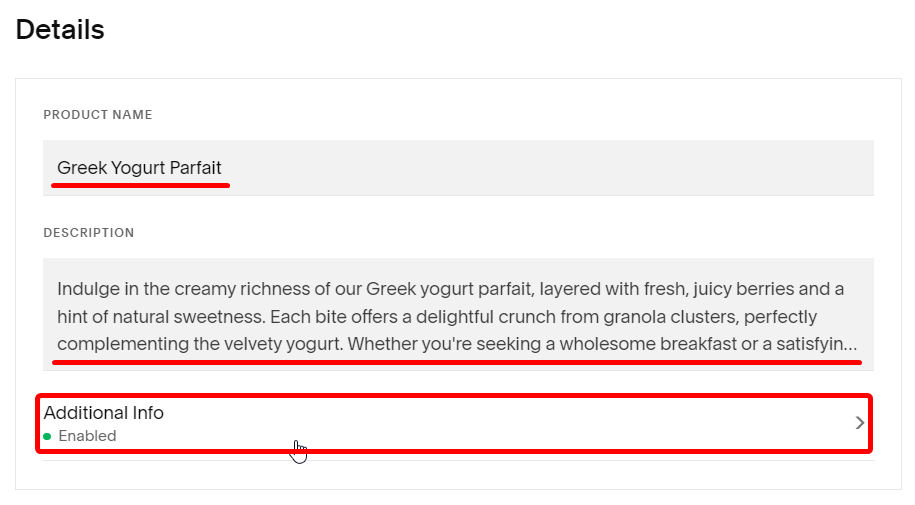
- Change the Product Name and Description to reflect the new product. Then, go to Additional Info to add ingredient information.
- Here, you can list off the ingredients, as well as any warnings about the product.
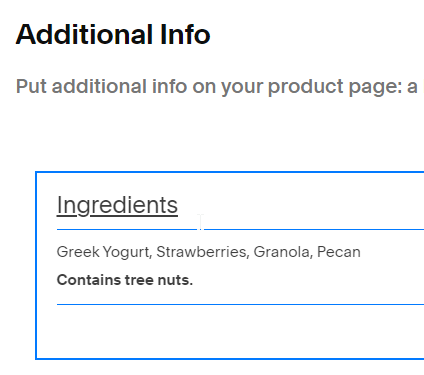
- Once you've finished that, click Apply.

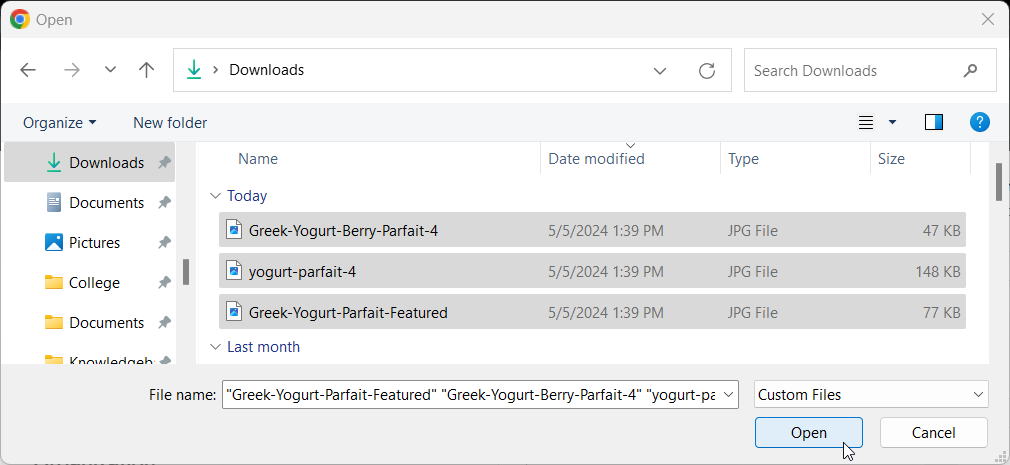
- Next, we'll add a few images of the product. Scroll down to Images and click the +, then Upload File.
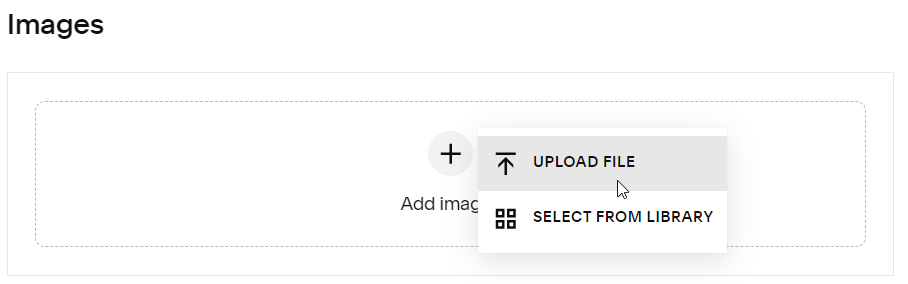
- Select the image(s) you want to upload, and choose Open.
- Now, click the best photo and choose Set as Thumbnail. This is the photo customers will see first on the Menu page.

- Now, scroll down a bit more. Under Inventory, you can set the Price for the item.

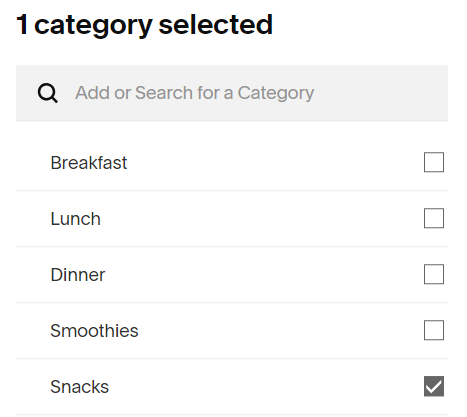
- Next, scroll down to the Organization section. Here, we will set the Category for the item (Breakfast, Lunch, etc). Click the + next to Categories, and select the category for the item.

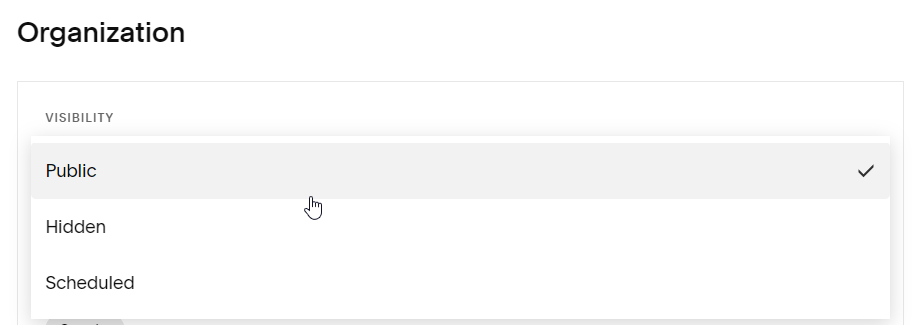
- Now, finally, we can publish the item. Under the same Organization tab as Categories, find the Visibility dropdown, and change it from Hidden to Public.
- Now, click Save in the top-right, and you’re done!
Removing Products
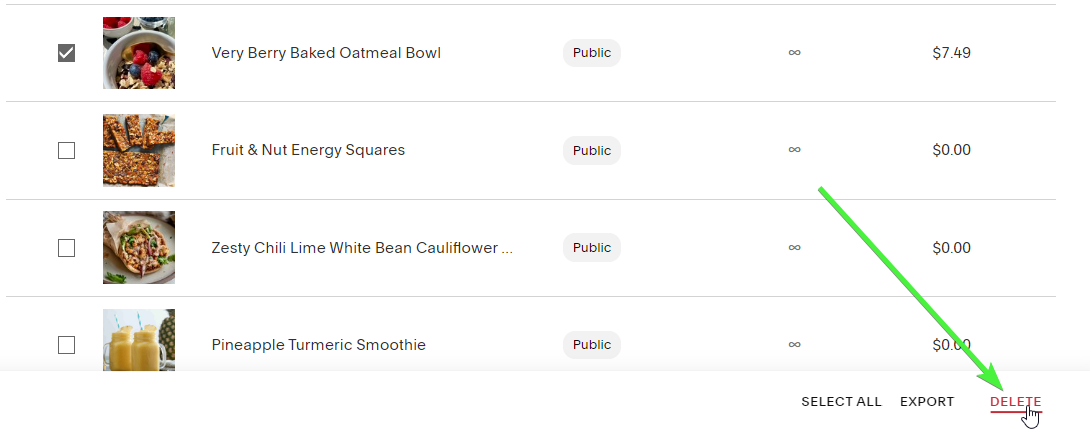
- Navigate to Dashboard ▸ OhDish (Website) ▸ Selling ▸ Products
- Select the product(s) you would like to delete using the checkboxes in the left column
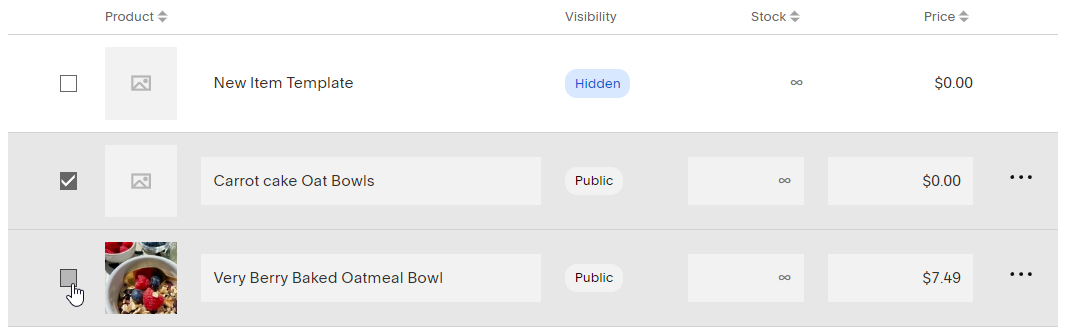
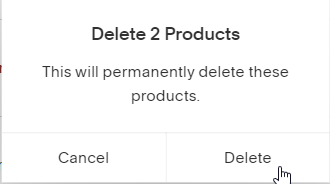
- With those selected, click Delete in the bottom-right of your screen
- Click Delete again to confirm
Customizing New User Email
This allows you to customize the email that new users receive when they sign up for an account with their email address.
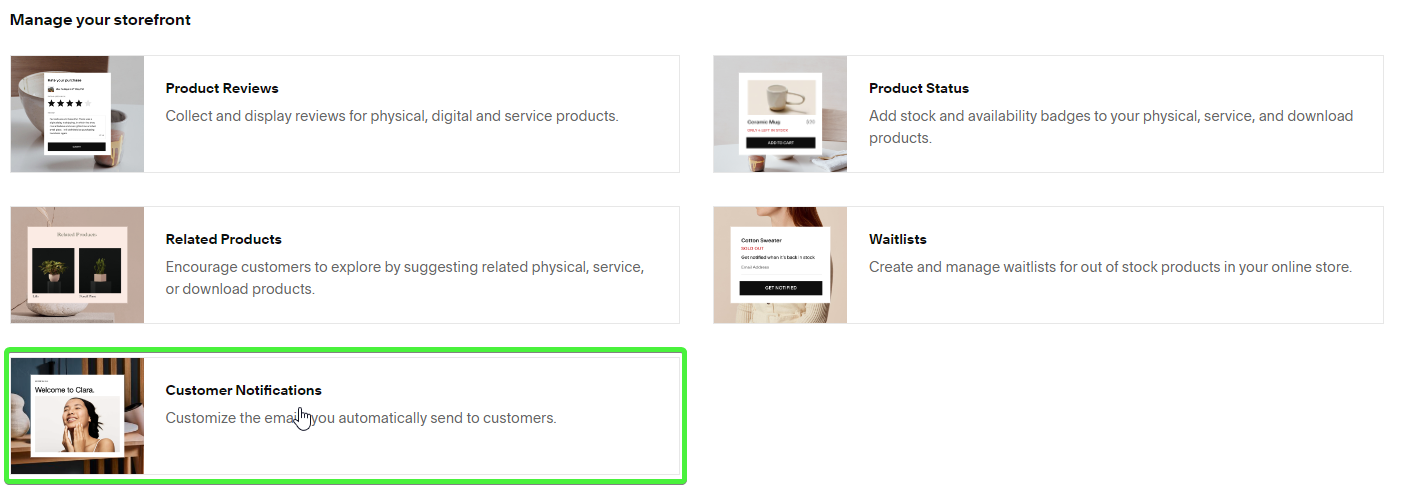
- Navigate to Dashboard ▸ OhDish (Website) ▸ Selling ▸ Selling Tools
- Scroll down, and under "Manage your storefront" choose Customer Notifications
- On the left, click Customer Accounts
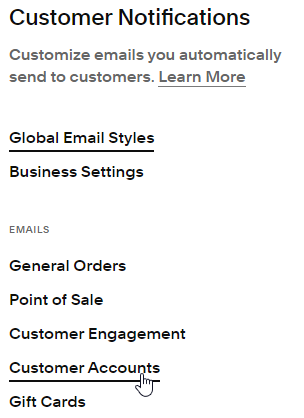
- On this page, there are multiple different emails you can customize. Make sure you are viewing the "Account Created" email, and choose Edit Email
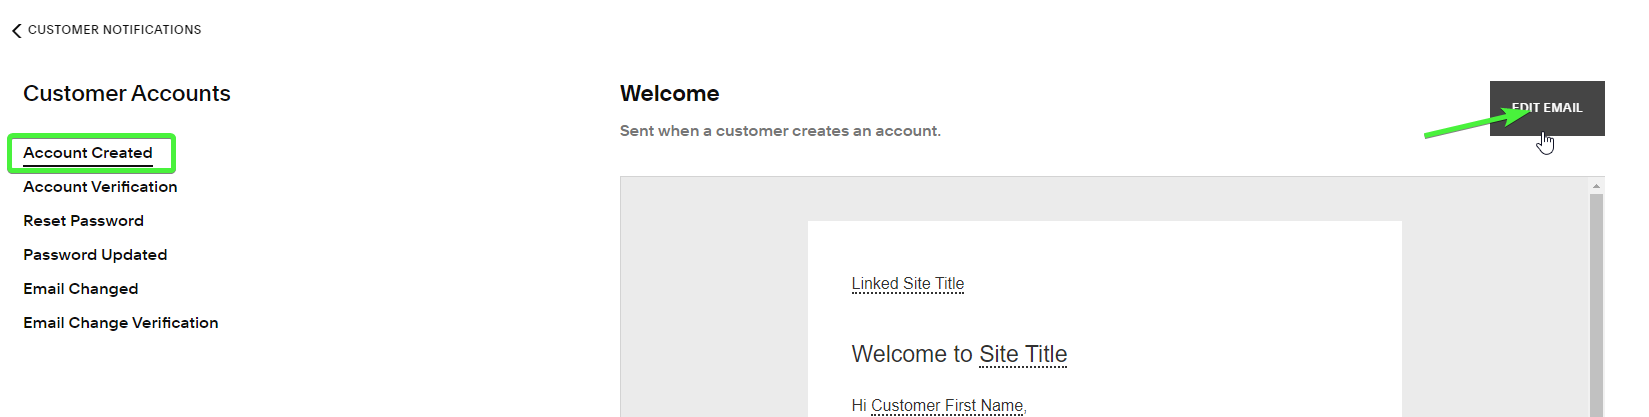
- Here, you can edit the contents of the New User email.
Sending Email to Subscribers
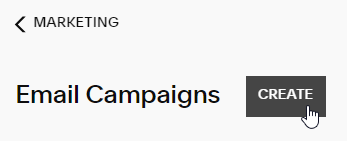
- Navigate to Dashboard ▸ OhDish (Website) ▸ Marketing ▸ Email Campaigns
- Next to "Email Campaigns", choose Create
- In the popup menu, choose Blast
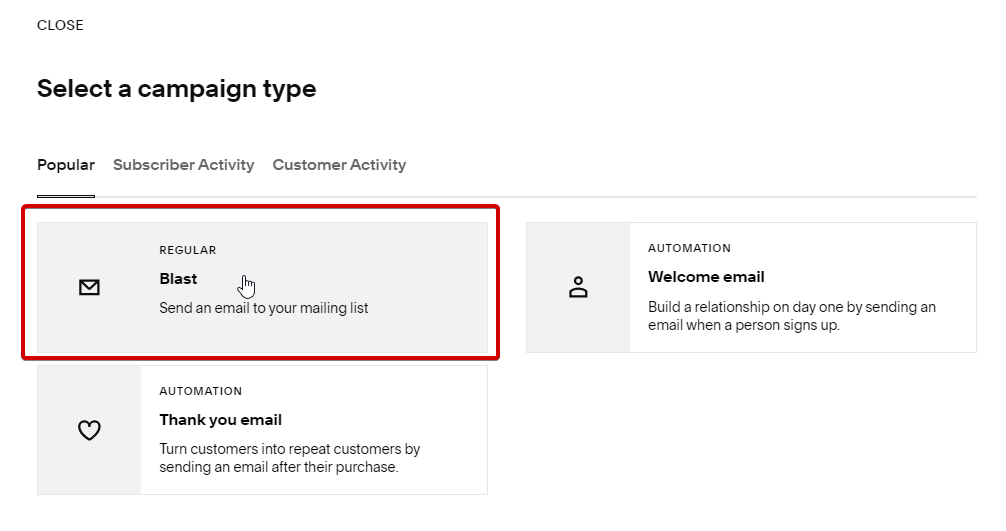
- In the next menu, there are a ton of email templates you can choose from, depending on what the purpose of the email is. Browse around and pick one you like, or you can choose Start Blank (in the bottom-left) to create an email design from scratch.
Preview a template you like, and click Use This Template in the top-right to begin editing it.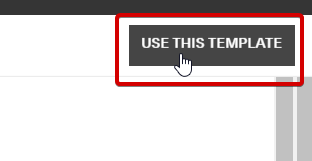
- The editing menu here is very similar to the standard website editor you can click to edit text, rearrange sections, and add/remove elements as you'd like.
- Once you're finished editing the email design, switch to the "Email" tab (top-right), and enter the Subject Line for the email.
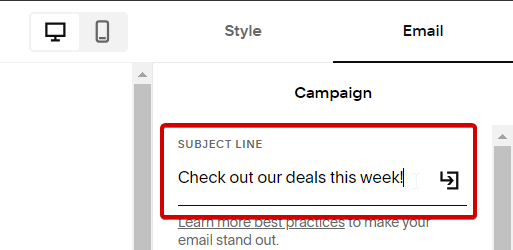
You can also click the icon on the right-side of this box to add variables to the subject line, such as the customer's name.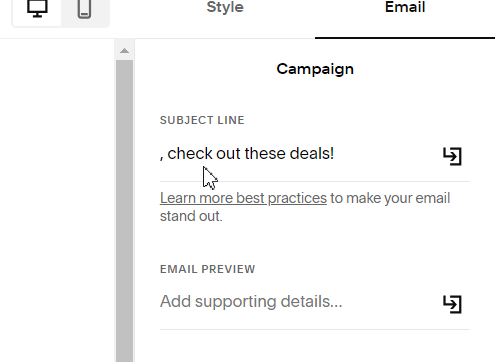
- In the Email Preview box, enter a short summary of the purpose of the email. For more info on best practices, see this article.
- Under the "To & From" section, click on Unique Recipients to choose who receives these emails.
SquareSpace categorizes some people, such as "Potential Customers" that have signed up but haven't purchased anything, "First-Time Customers" that have only placed 1 order, etc.
Choose a list you like, or "All Subscribers" to send to everybody, then press Back to go back to the Email options screen. - You can play around with the settings here as you'd like, it's all pretty straightforward. You can even schedule when you'd like the email to send.
Once you're finished, choose Send To Recipients to send out the email (or schedule it, if you don't want to send it immediately).
Editing Discount Codes
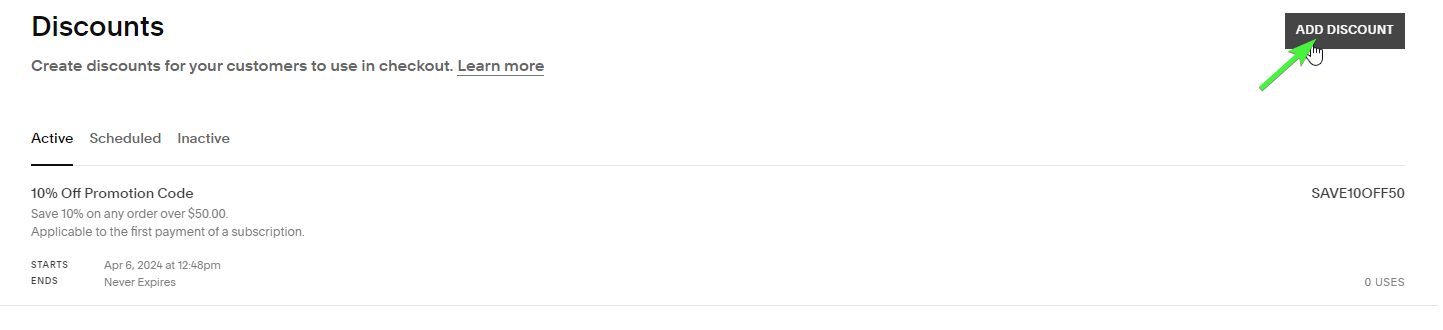
- Navigate to Dashboard ▸ OhDish (Website) ▸ Selling ▸ Discounts
- Here, you will see a list of your discount codes. To create a new discount code, choose "Add Discount" in the top-right.
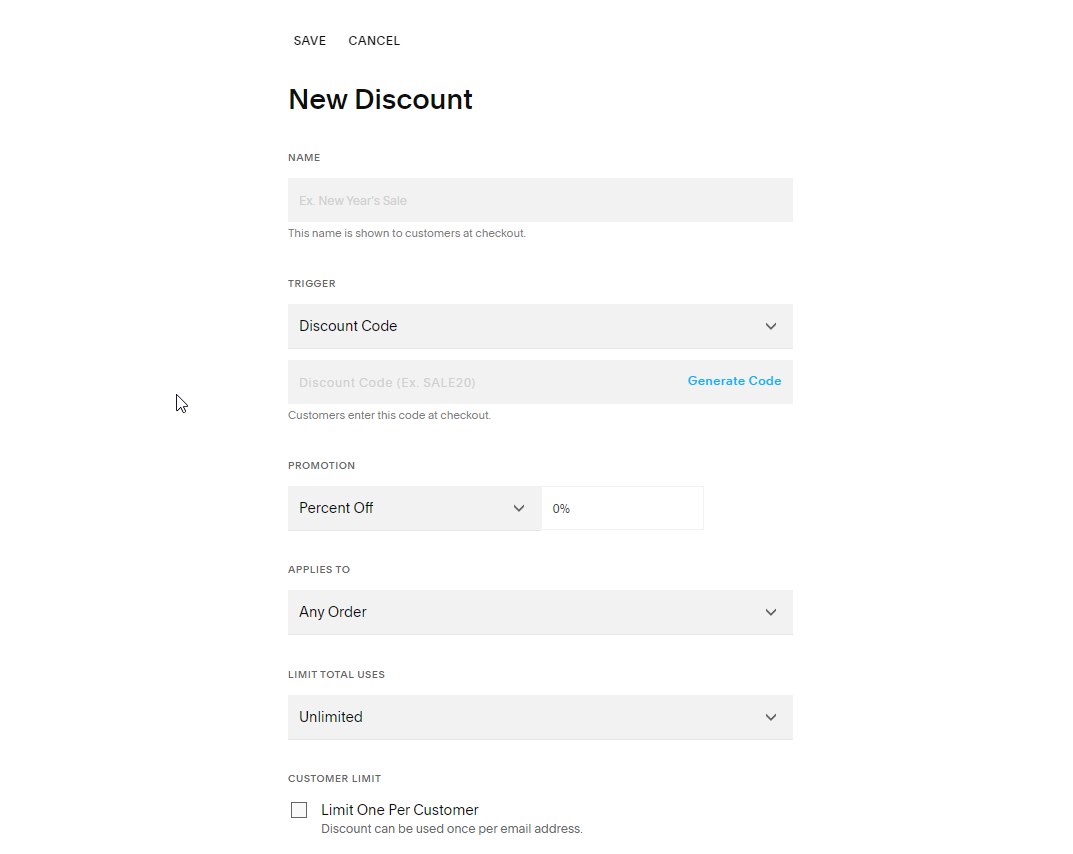
- Here, you can customize the details of your new discount. This is all pretty self-explanatory, so I won't go into the details.Once you've set up the discount how you'd like, choose Save
- All set! Customers can now use the discount code.
If you'd like to edit or delete a discount code, just go back to the Discounts page and click it. At the very bottom of this menu, there is a Delete Discount button.
Editing Dates
Editing the header banner
- Navigate to this page.
- Change the text in the textbox on the left of the page
- Click Save in the top-left to save your changes